Are you preparing for Fronend or Full-Stack Developer Interviews? Interviewers will definitely ask JavaScript coding questions.
Building a Stopwatch using JavaScript is one of the fundamental interview problems where interviewers test your understanding of
- DOM Manipulation
- Event Handiling
- setInterval() and clearInterval()
- Basic time ( Hours, Minutes, Seconds ) logic.
At first glance, this question looks easy, but many candidates get nervous during interviews and make small logical mistakes.
In this resource, you’ll learn simple and clean logic building to craete a Stopwatch using JavaScript and update hours, minutes, and seconds correctly.
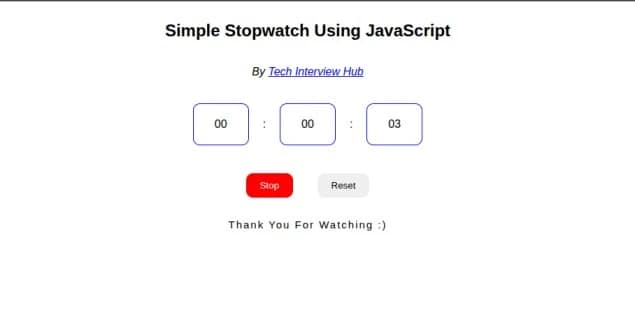
Final Output Preview:-
We’ll build this step by step using CodeSandbox Environment. At the end of this blog, you can check the Live Demo of the working code
Step 1: HTML Structure for Stopwatch
<div class="stopwatch">
  <div id="hours" class="hours">00</div>
  :
  <div id="minutes" class="minutes">00</div>
  :
  <div id="seconds" class="seconds">00</div>
</div>

<div class="stopwatch-actions">
  <button id="start-stop">Start</button>
  <button id="reset">Reset</button>
</div>
Explanation:
- We have taken 3 divs HTML Element to display Hours, Minutes, and Seconds
- Each div has a unique ID so we can update values using JavaScript
- Two action buttons are used. 1. Start/Stop -> To control (start and stop) the stopwatch and 2. Reset -> To reset timer to 00:00:00
IDs are assigned to interact with elements using JavaScript.
Step 2: CSS (Optional – For Better UI)
Note:- This is not a design question in interviews. Functionality matters more than UI.
.stopwatch {
  display: flex;
  align-items: center;
  justify-content: center;
  font-size: 40px;
  background: #111;
  color: #fff;
  padding: 20px 30px;
  border-radius: 10px;
}

.stopwatch-actions {
  margin-top: 20px;
  text-align: center;
}

button {
  padding: 10px 20px;
  margin: 0 5px;
  cursor: pointer;
}

button.stop {
  background-color: red;
  color: #fff;
}
CSS Explanation:-
- Flexbox is used to align elements in the center. We use Flexbox in One Dimentional Layout. You can learn more about flexbox here.
- Background color, padding, and border-radius improve appearance
- You can skip heavy styling in interviews and focus on logic.
Step 3: JavaScript – Main Logic – To create a Stopwatch
This is the most important part of the interview question.
1. Initialize and assign Time ( Hours, Minutes, and Seconds ) Elements
const hoursItem = document.getElementById("hours");
const minutesItem = document.getElementById("minutes");
const secondsItem = document.getElementById("seconds");- These Elements will be update in Every Seconds.
2. Access Buttons ( start/stop and rest )
const startStop = document.getElementById("start-stop");
const reset = document.getElementById("reset");- We’ll add click events to these action buttons
3. Initialize Variables
let hours = 0,
  minutes = 0,
  seconds = 0;

let timer = null,
  isRunning = false;
Why These Variables?
hours,minutes,secondsare used to store time valuestimervariable stores interval IDisRunningis a Boolean ( true/false ) variable prevents multiplesetInterval()calls
This is a very important interview concept.
4. Start and Stop Logic in this Stopwatch
const startOrStopWatch = () => {
  if (!isRunning) {
    timer = setInterval(() => {
      seconds++;

      if (seconds === 60) {
        seconds = 0;
        minutes++;
      }

      if (minutes === 60) {
        minutes = 0;
        hours++;
      }

      updateTime();
    }, 1000);

    startStop.textContent = "Stop";
    startStop.classList.add("stop");
    isRunning = true;
  } else {
    clearInterval(timer);
    timer = null;
    startStop.textContent = "Start";
    startStop.classList.remove("stop");
    isRunning = false;
  }
};
JavaScript Logic Explanation
- If the stopwatch is not running:
- Start
setInterval()with 1000 ms (1 second) [ Learn more about setInterval() ] - Increment
seconds
- Start
- When seconds reach 60:
- Reset seconds to
0 - Increment minutes
- Reset seconds to
- Same logic applies for minutes to hours
updateTime()updates DOM values. It’s a Function to update Hours, minutes , and second element text update. check code below.- If stopwatch is already running:
clearInterval()stops it [ Learn more aboutclearInterval() ]- Reset button text and state
This part tests real interview logic.
5. Update time on UI ( Logic to maintain two digit format )
const updateTime = () => {
  hoursItem.textContent = hours < 10 ? "0" + hours : hours;
  minutesItem.textContent = minutes < 10 ? "0" + minutes : minutes;
  secondsItem.textContent = seconds < 10 ? "0" + seconds : seconds;
};
Why < 10 Check?
- This ensures two-digit pattern
- Example:
5–>0517 –>17
Interviewers often ask this formatting logic.
6. Reset action button logic
const resetWatch = () => {
  clearInterval(timer);
  timer = null;

  hours = 0;
  minutes = 0;
  seconds = 0;

  updateTime();

  isRunning = false;
  startStop.textContent = "Start";
  startStop.classList.remove("stop");

  alert("Reset stopwatch");
};
Reset Logic Explained
- Stops the running timer and set timer value to null.
- Resets all values to
0. As when we load fisrt time hours, minutes, and seconds value is 0 - Updates UI immediately using updateTime() function.
- Resets button text to Start.
7. Add event listener to both action buttons
startStop.addEventListener("click", startOrStopWatch);
reset.addEventListener("click", resetWatch);
Live Demo and check out full code
We have used codesandbox JavaScript Environment so you can visit the public url below to check code .
Conclusion
Creating a Stopwatch using JavaScript is a classic interview coding question that tests:
- JavaScript fundamentals
- DOM manipulation
- Event handling
- Time-based logic
- Clean code structure
If you understand this logic clearly, you’ll be confident in JavaScript machine coding rounds. Check it out our more Interview questions and Blogs .

![Top CSS Interview Questions and Answers [Latest & Most Asked]](https://mlegnhsg05mg.i.optimole.com/cb:ir3L.9a8/w:1024/h:684/q:mauto/f:best/https://techinterviewhub.in/wp-content/uploads/2025/02/pexels-kampus-8439764-scaled.jpg)