If you’re preparing for a React interview, chances are you’ll encounter a coding challenge involving a Todo List App. This classic question tests your understanding of React components, state management, event handling, conditional rendering, and more.
In this blog, we’ll walk through building a basic Todo App in React, step-by-step, using CodeSandbox for quick prototyping. Let’s dive in!
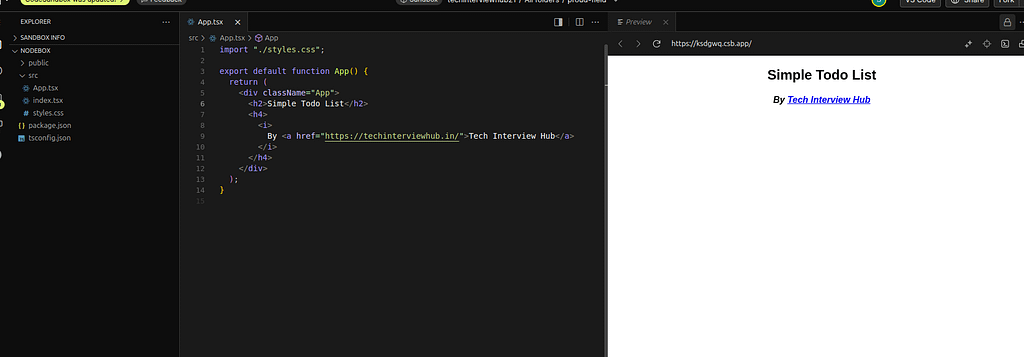
import "./styles.css";

export default function App() {
  return (
    <div className="App">
      <h2>Simple Todo List</h2>
      <h4>
        <i>
          By <a href="https://techinterviewhub.in/">Tech Interview Hub</a>
        </i>
      </h4>
    </div>
  );
}
🎯 Prerequisites
Before we begin, ensure you have:
- Basic knowledge of JavaScript
- Familiarity with React and functional components
- Understanding of state, events, and conditional rendering
Step 1: Craete the UI
Let’s start by building the UI with an input field and a button to add todos. Each todo will consist of a checkbox, the todo name, and a delete button.
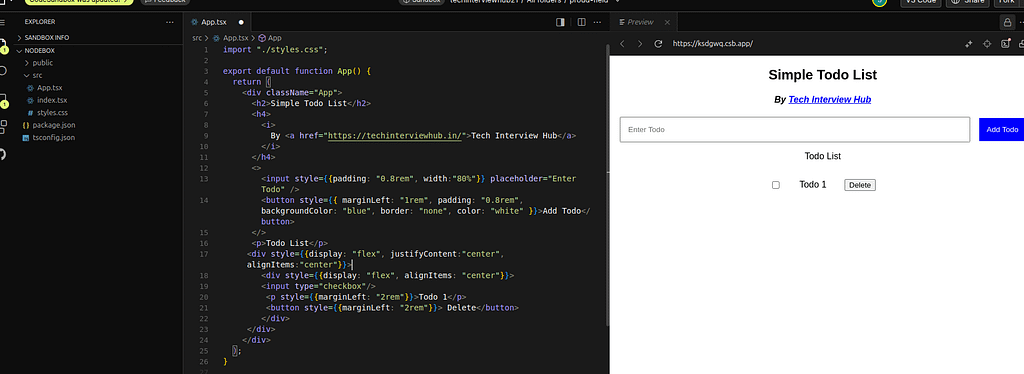
import "./styles.css";

export default function App() {
  return (
    <div className="App">
      <h2>Simple Todo List</h2>
      <h4>
        <i>
          By <a href="https://techinterviewhub.in/">Tech Interview Hub</a>
        </i>
      </h4>
      <>
        <input
          style={{ padding: "0.8rem", width: "80%" }}
          placeholder="Enter Todo"
        />
        <button
          style={{
            marginLeft: "1rem",
            padding: "0.8rem",
            backgroundColor: "blue",
            border: "none",
            color: "white",
          }}
        >
          Add Todo
        </button>
      </>
      <p>Todo List</p>
      <div
        style={{
          display: "flex",
          justifyContent: "center",
          alignItems: "center",
        }}
      >
        <div style={{ display: "flex", alignItems: "center" }}>
          <input type="checkbox" />
          <p style={{ marginLeft: "2rem" }}>Todo 1</p>
          <button style={{ marginLeft: "2rem" }}> Delete</button>
        </div>
      </div>
    </div>
  );
}
Step2: Adding Todo into List
- Let’s make the input and button functional using React’s
useStatehook.
import { useState } from "react";

const [todoName, setTodoName] = useState("");
const [todo, setTodo] = useState([]);- We’ll update the input to reflect state:
<input
  style={{ padding: "0.8rem", width: "80%" }}
  placeholder="Enter Todo"
  onChange={(e) => setTodoName(e.target.value)}
  value={todoName}
/>- On clicking the Add button, we’ll push the new todo into the array:
const addTodoMethod = () => {
  if (todoName.trim()) {
    setTodo([...todo, { todo: todoName, completed: false }]);
    setTodoName("");
  } else {
    alert("Enter a valid todo");
  }
};Note: We use the spread operator ... to preserve the existing todos while adding a new one.
Step3: Display the Todo List
- Now we’ll loop through the
todoarray and render each item using.map():
<p>Todo List</p>
<div
  style={{
    display: "flex",
    flexDirection: "column",
    justifyContent: "center",
    alignItems: "center",
  }}
>
  {todo.map((item, index) => (
    <div key={index} style={{ display: "flex", alignItems: "center" }}>
      <input type="checkbox" />
      <p style={{ marginLeft: "2rem" }}>{item.todo}</p>
      <button style={{ marginLeft: "2rem" }}>Delete</button>
    </div>
  ))}
</div>
Step 4: Delete a Specific Todo
To delete a todo, we’ll pass the index to a function and filter it out of the list:
<button onClick={() => deleteTodo(index)} style={{ marginLeft: "2rem" }}>
  Delete
</button>

const deleteTodo = (index) => {
  const newTodo = todo.filter((_, i) => i !== index);
  setTodo(newTodo);
};
Step 5: Mark a Todo as Complete
- Clicking the checkbox will toggle the completion status and style the todo accordingly:
<input
  onClick={() => toggleCompleteTodo(index)}
  type="checkbox"
/>
<p
  style={{
    marginLeft: "2rem",
    textDecoration: item.completed ? "line-through" : "none",
    opacity: item.completed ? 0.5 : 1,
  }}
>
  {item.todo}
</p>

const toggleCompleteTodo = (index) => {
  const newTodo = [...todo];
  newTodo[index].completed = !newTodo[index].completed;
  setTodo(newTodo);
};
Final Output:-
You’ve now built a fully functional Todo List App in React — complete with add, delete, and mark-as-complete features.
This is a great exercise that interviewers love to see, and it’s a solid demonstration of your practical React skills.
import "./styles.css";
import { useState } from "react";

export default function App() {
  const [todo, setTodo] = useState([]);
  const [todoName, setTodoName] = useState("");

  // add todo method function
  const addTodoMethod = () => {
    if (todoName.trim()) {
      setTodo([...todo, { todo: todoName, completed: false }]);
      setTodoName("");
    } else {
      alert("Enter valid todo");
    }
  };

  //Delete Todo
  const deleteTodo = (index) => {
    // console.log(index);
    const newTodo = todo.filter((_, i) => i !== index);
    setTodo(newTodo);
  };

  //complete a todo
  const toggleCompleteTodo = (index) => {
    const newTodo = [...todo];
    newTodo[index].completed = !newTodo[index].completed;
    setTodo(newTodo);
  };

  return (
    <div className="App">
      <h2>Simple Todo List</h2>
      <h4>
        <i>
          By <a href="https://techinterviewhub.in/">Tech Interview Hub</a>
        </i>
      </h4>
      <>
        <input
          style={{ padding: "0.8rem", width: "80%" }}
          placeholder="Enter Todo"
          onChange={(e) => setTodoName(e.target.value)}
          value={todoName}
        />
        <button
          style={{
            marginLeft: "1rem",
            padding: "0.8rem",
            backgroundColor: "blue",
            border: "none",
            color: "white",
          }}
          onClick={addTodoMethod}
        >
          Add Todo
        </button>
      </>
      <p>Todo List</p>
      <div
        style={{
          display: "flex",
          flexDirection: "column",
          justifyContent: "center",
          alignItems: "center",
        }}
      >
        {todo.map((item, index) => {
          return (
            <div key={index} style={{ display: "flex", alignItems: "center" }}>
              <input
                onClick={() => toggleCompleteTodo(index)}
                type="checkbox"
              />
              <p
                style={{
                  marginLeft: "2rem",
                  textDecoration: item.completed ? "line-through" : "none",
                  opacity: item.completed ? 0.5 : 1,
                }}
              >
                {item.todo}
              </p>
              <button
                onClick={() => deleteTodo(index)}
                style={{ marginLeft: "2rem" }}
              >
                {" "}
                Delete
              </button>
            </div>
          );
        })}
      </div>
    </div>
  );
}
💡 Pro Tip:
- Consider storing todos in
localStorageto make them persistent - Try adding filters: All, Active, Completed
- Style with Tailwind CSS or Bootstrap for a cleaner UI
Try it Live
👉 Open Simple Todo React App on CodeSandbox
Suggested Resources:
- Top CSS Interview Questions
- How to prepare for Remote Tech Interview?
- PHP Documentation – Classes and Objects
- Create a stopwatch using React
[nls_theme2]

![Top CSS Interview Questions and Answers [Latest & Most Asked]](https://mlegnhsg05mg.i.optimole.com/cb:ir3L.9a8/w:1024/h:684/q:mauto/f:best/https://techinterviewhub.in/wp-content/uploads/2025/02/pexels-kampus-8439764-scaled.jpg)