Are you preparing for a Frontend React developer interview?
Besides tricky theory-based questions, interviewers often test your problem-solving skills with real-world challenges. One unique task is:
“Can you create a stopwatch using React with functional components?”
Sounds simple, right? But it tests your understanding of React hooks, conditional rendering, timing functions, and component state management.
In this guide, we’ll walk through building a fully functional stopwatch in React step-by-step using CodeSandbox. You’ll understand every line of code — with comments, logic, and how to explain it during interviews.
🛠️ Tools & Setup
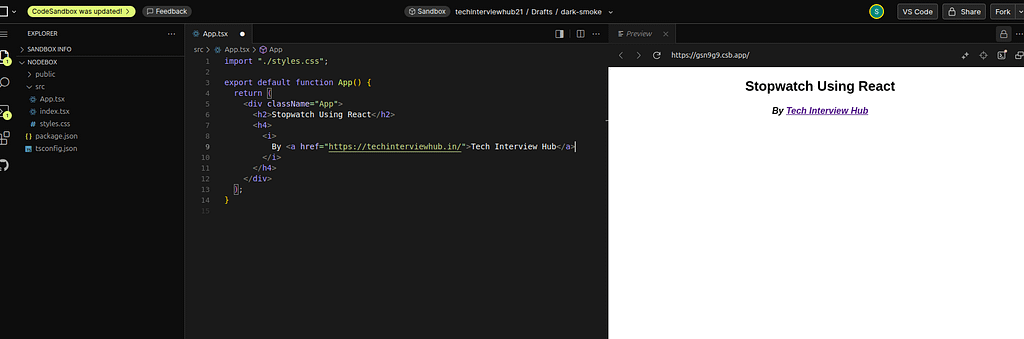
We’ll be using CodeSandbox — an online editor to quickly run and test React code.
After creating a new React sandbox, you’ll see a screen with a default App.js file. We’ll replace that with our stopwatch implementation.
Step 1: Create Stopwatch UI Elements
Let’s start by building the structure of the stopwatch: Hours, Minutes, and Seconds, along with Start and Reset buttons.
import "./styles.css";

export default function App() {
  return (
    <div className="App">
      <h2>Stopwatch Using React</h2>
      <h4>
        <i>
          By <a href="https://techinterviewhub.in/">Tech Interview Hub</a>
        </i>
      </h4>

      <div>
        <div>
          <p>00</p>
          <p><b>Hours</b></p>
        </div>
        <div>
          <p>00</p>
          <p><b>Minutes</b></p>
        </div>
        <div>
          <p>00</p>
          <p><b>Seconds</b></p>
        </div>
      </div>

      <div>
        <button>Start</button>
        <button>Reset</button>
      </div>
    </div>
  );
}
Step 2: Plan the Functionality
🔁 Stopwatch Logic:
- Click
Start: stopwatch begins - Button label changes to
Stop - Click
Stop: stopwatch pauses - Click
Reset: stopwatch resets to 00:00:00
Step 3: Declare States and Refs
We need two states and one reference:
time: current time (in seconds)isRunning: whether stopwatch is activetimerRef: to hold the interval ID
import { useState, useRef } from "react";

const [time, setTime] = useState(0); // Total time in seconds
const [isRunning, setIsRunning] = useState(false);
const timerRef = useRef(null); // Holds interval ID
Step 4: Add Toggle Start/Stop Functionality
Here’s where the stopwatch logic comes in:
const toggleStopwatch = () => {
  if (isRunning) {
    setIsRunning(false);
    clearInterval(timerRef.current); // Stop the interval
  } else {
    setIsRunning(true);
    timerRef.current = setInterval(() => {
      setTime((prevTime) => prevTime + 1); // Increment time every second
    }, 1000);
  }
};
📌 What is useRef?
The useRef() hook stores a mutable reference that persists across re-renders without triggering a render itself. We use it here to store the setInterval ID and later clear it.
Step 5: Toggle Button Text
Update the start button to dynamically change its label:
<button onClick={toggleStopwatch}>
  {isRunning ? "Stop" : "Start"}
</button>
Step 6: Convert Time to H:M:S
We’ll convert total seconds into HH:MM:SS format.
const hours = Math.floor(time / 3600);
const minutes = Math.floor((time % 3600) / 60);
const seconds = time % 60;

// Format as 2-digit
const format = (num) => String(num).padStart(2, "0");
Step 7: Display Time on UI
Replace hardcoded values with dynamic ones:
<div>
  <p>{format(hours)}</p>
  <p><b>Hours</b></p>
</div>
<div>
  <p>{format(minutes)}</p>
  <p><b>Minutes</b></p>
</div>
<div>
  <p>{format(seconds)}</p>
  <p><b>Seconds</b></p>
</div>
Step 8: Reset Functionality
const resetWatch = () => {
  clearInterval(timerRef.current); // Stop interval
  setTime(0); // Reset time
  setIsRunning(false); // Reset state
};

<button onClick={resetWatch}>Reset</button>
Step 9: Align Components Horizontally (UI)
Let’s display Hours, Minutes, and Seconds side by side using inline CSS:
<div style={{ display: "flex", justifyContent: "center", gap: "20px" }}>
  {/* Hours, Minutes, Seconds */}
</div>
🧾 Full Code
Here’s the full working code for the stopwatch:
import { useState, useRef } from "react";
import "./styles.css";

export default function App() {
  const [time, setTime] = useState(0);
  const [isRunning, setIsRunning] = useState(false);
  const timerRef = useRef(null);

  const toggleStopwatch = () => {
    if (isRunning) {
      setIsRunning(false);
      clearInterval(timerRef.current);
    } else {
      setIsRunning(true);
      timerRef.current = setInterval(() => {
        setTime((prevTime) => prevTime + 1);
      }, 1000);
    }
  };

  const resetWatch = () => {
    clearInterval(timerRef.current);
    setTime(0);
    setIsRunning(false);
  };

  const hours = Math.floor(time / 3600);
  const minutes = Math.floor((time % 3600) / 60);
  const seconds = time % 60;

  const format = (num) => String(num).padStart(2, "0");

  return (
    <div className="App">
      <h2>Stopwatch Using React</h2>
      <h4>
        <i>
          By <a href="https://techinterviewhub.in/">Tech Interview Hub</a>
        </i>
      </h4>

      <div style={{ display: "flex", justifyContent: "center", gap: "20px" }}>
        <div>
          <p>{format(hours)}</p>
          <p><b>Hours</b></p>
        </div>
        <div>
          <p>{format(minutes)}</p>
          <p><b>Minutes</b></p>
        </div>
        <div>
          <p>{format(seconds)}</p>
          <p><b>Seconds</b></p>
        </div>
      </div>

      <div style={{ marginTop: "20px" }}>
        <button onClick={toggleStopwatch}>
          {isRunning ? "Stop" : "Start"}
        </button>
        <button onClick={resetWatch}>Reset</button>
      </div>
    </div>
  );
}
Conclusion
This stopwatch is a great React interview coding challenge that demonstrates:
useStatefor state managementuseReffor storing interval IDsetIntervalandclearIntervalfor timer control- Conditional rendering for dynamic UI
🧠 Pro Tip: During interviews, explain your thought process clearly. Mention why useRef was used instead of useState for timerRef.
🔗 Try it Live
👉 Open Stopwatch on CodeSandbox
[nls_theme2]

![Top CSS Interview Questions and Answers [Latest & Most Asked]](https://mlegnhsg05mg.i.optimole.com/cb:ir3L.9a8/w:1024/h:684/q:mauto/f:best/https://techinterviewhub.in/wp-content/uploads/2025/02/pexels-kampus-8439764-scaled.jpg)