Are you preparing for JavaScript interviews at top tech companies like Amazon?
One commonly asked UI question involves creating a dynamic grid and highlighting the row and column of a clicked cell.
In this blog post, we’ll walk through this interview question step-by-step using HTML, CSS, and JavaScript, with a clean and practical example. Perfect for frontend developers and interview preparation!
Problem Statement
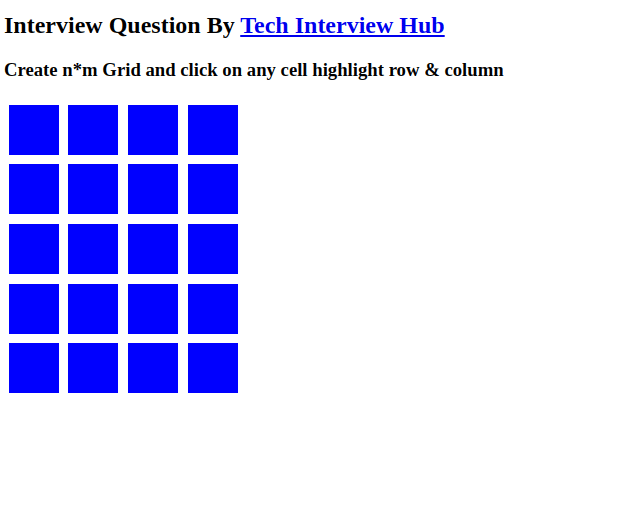
Create an n × m grid using JavaScript.
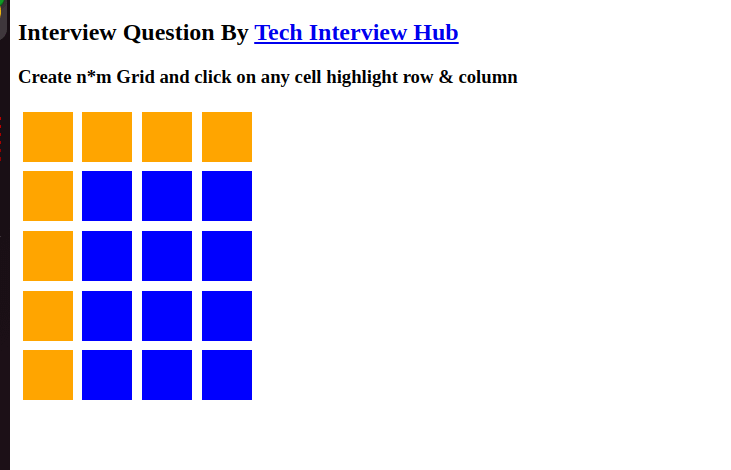
When a user clicks on any cell, highlight the entire row and column.
Real World Use Case?
This pattern is used in:
- Spreadsheet apps like Excel or Google Sheets
- Table highlighting in admin dashboards
- Visualizing data in matrix-style layouts
Tech Stack Used?
- HTML for structure
- CSS for styling
- JavaScript for logic and DOM manipulation
Enviroment setup?
This coding assignment was built using the HTML + CSS environment on CodeSandbox. Now, let’s walk through it step by step to understand how it works.
Step-by-Step Code Explanation:
1. Create project structure
Files to create:
- index.html
- main.js
- styles.css
2. index.html structure
<!DOCTYPE html>
<html lang="en">
  <head>
    <meta charset="UTF-8" />
    <meta name="viewport" content="width=device-width, initial-scale=1.0" />
    <meta http-equiv="X-UA-Compatible" content="ie=edge" />
    <title>HTML + CSS</title>
    <link rel="stylesheet" href="styles.css" />
  </head>
  <body>
    <h1></h1>
    <h2>Interview Question By <a href="https://techinterviewhub.in/">Tech Interview Hub</a></h2>
    <h3>Create n*m Grid and click on any cell highlight row & column</h3>
    <div id="matrix"></div>

    <script src="main.js"></script>
  </body>
</html>
Don’t forget to link your CSS and JS files properly:
<link rel="stylesheet" href="styles.css"/>
<script src="main.js"></script>
JavaScript Logic (main.js):-
Before We Dive into the JavaScript Code
Everything related to this task revolves around JavaScript. From dynamically creating the grid to handling user interactions like clicking on a cell, JavaScript plays the most important role. Therefore, it’s very important that you understand the following explanation carefully. We’ll break down the code step-by-step so even if you’re a beginner, you’ll be able to grasp the logic easily. Let’s get started!
Step-1 Declare rows and columns
n= number of rows.m= number of columns.- In this case, we want a 5 × 4 grid.
// declare row(n) and col(m)
const n = 5;
const m = 4;
Step:2 Select the parent div where grid will be created
- Select the
<div id="matrix"></div>from HTML. - We will add all our rows and cells inside this
matrixdiv.
const parentMatrix = document.getElementById("matrix");Step-3 Create an array to store all cells
allRowswill store all the rows, and inside each row, all the cells.- Think of
allRowslike a 2D array: - Example:
[
  [cell1, cell2, cell3, cell4],   // first row
  [cell5, cell6, cell7, cell8],   // second row
  ...
]
const allRows = [];Step-4 Function to create the matrix (grid)
for (let i = 0; i < n; i++)→ loop to create rows.- Create a
<div>for each row. - Add class
"rowcell"to style it later. rowCellsarray will store all cells of this row.- For each row, run a second loop to create cells (columns).
- Create
<div>for each cell. - Add class
"cell"for CSS styling. - Store the row number and column number inside the cell itself.
- This helps later to know which cell was clicked.
      divEle.dataset.row = i;
divEle.dataset.col = j;- Add each cell inside its respective row.
- After finishing all cells of a row:
- Add the full row (
divRow) to the parentmatrixdiv. - Save the row (
rowCells) insideallRowsarray.
      divRow.appendChild(divEle);
      rowCells.push(divEle);
    }
    parentMatrix.appendChild(divRow);
    allRows.push(rowCells);
  }
};
Complete createMatix() code:
const createMatix = () => {
  for (let i = 0; i < n; i++) {
    let divRow = document.createElement("div");
    divRow.classList.add("rowcell");
    let rowCels = [];
   for (let j = 0; j < m; j++) {
      let divEle = document.createElement("div");
      divEle.classList.add("cell");

      divEle.dataset.row = i;
      divEle.dataset.col = j;

      divRow.appendChild(divEle);
      rowCels.push(divEle);
    }
    parentMatrix.appendChild(divRow);
    allRows.push(rowCels);
  }
};
Step-5 Event listener on each cell
allRows.flat()flattens the 2D array into 1D array..forEach(cell => {...})adds a click event to every cell.- When a cell is clicked:
- Read its stored
rowandcol. - First, clear any old highlights.
- Then, highlight the newly clicked row and column.
allRows.flat().forEach((cell) => {
  cell.addEventListener("click", () => {
    console.log("clicked");
    let row = parseInt(cell.dataset.row);
    let col = parseInt(cell.dataset.col);
    clearHighLight();
    heighlight(row, col);
  });
});
Step-6 Clear all existing highlights
- Remove
"highlight"class from every cell. - This ensures only the clicked row and column are highlighted.
const clearHighlight = () => {
  allRows.flat().forEach((cell) => {
    cell.classList.remove("highlight");
  });
};

Now you're thinking about the what is clearHighLight() and heighlight(row, col);
Step-7 Highlight selected row and column
- First loop:
- Second loop:
- Highlight all cells in the selected row.
- Result:
- When you click on a cell, its full row and full column light up!
const highlight = (row, col) => {
  for (let i = 0; i < n; i++) {
    allRows[i][col].classList.add("highlight");
  }

  for (let i = 0; i < m; i++) {
    allRows[row][i].classList.add("highlight");
  }
};
CSS Styling:-
.cell→ normal cells have blue color..rowcell→ rows are displayed horizontally (flexbox)..highlight→ when active, cells turn orange!
.cell {
  width: 50px;
  height: 50px;
  background-color: blue;
  margin: 0.3rem;
  cursor: pointer;
  transition: background-color 0.3s ease;
}

.rowcell {
  display: flex;
}

.heighlight {
  background-color: orange !important;
}
Final Output:-
Final code:
index.html:-
<!DOCTYPE html>
<html lang="en">
  <head>
    <meta charset="UTF-8" />
    <meta name="viewport" content="width=device-width, initial-scale=1.0" />
    <meta http-equiv="X-UA-Compatible" content="ie=edge" />
    <title>HTML + CSS</title>
    <link rel="stylesheet" href="styles.css" />
  </head>
  <body>
    <h1></h1>
    <h2>
      Interview Question By
      <a href="https://techinterviewhub.in/">Tech Interview Hub</a>
    </h2>
    <h3>Create n*m Grid and click on any cell highlight row & column</h3>
    <div id="matrix"></div>

    <script src="main.js"></script>
  </body>
</html>
main.js:-
// console.log("Test");

// declare row(n) and col(m)
const n = 5;
const m = 4;

//assin matrix div we'll add entire grid system within this div element
const parentMatrix = document.getElementById("matrix");

// Store all rows and cells for later reference
const allRows = [];

const createMatix = () => {
  for (let i = 0; i < n; i++) {
    let divRow = document.createElement("div");
    divRow.classList.add("rowcell");
    let rowCels = [];

    for (let j = 0; j < m; j++) {
      let divEle = document.createElement("div");
      divEle.classList.add("cell");

      divEle.dataset.row = i;
      divEle.dataset.col = j;

      divRow.appendChild(divEle);
      rowCels.push(divEle);
    }
    parentMatrix.appendChild(divRow);
    allRows.push(rowCels);
  }
};

const heighlight = (row, col) => {
  for (let i = 0; i < n; i++) {
    allRows[i][col].classList.add("heighlight");
  }

  for (let i = 0; i < m; i++) {
    allRows[row][i].classList.add("heighlight");
  }
};

const clearHighLight = () => {
  allRows.flat().forEach((cell) => {
    cell.classList.remove("heighlight");
  });
};

createMatix();
// console.log(allRows);

allRows.flat().forEach((cell) => {
  cell.addEventListener("click", () => {
    console.log("clicked");
    let row = parseInt(cell.dataset.row);
    let col = parseInt(cell.dataset.col);
    clearHighLight();
    heighlight(row, col);
  });
});
styles.css:-
.cell {
  width: 50px;
  height: 50px;
  background-color: blue;
  margin: 0.3rem;
  cursor: pointer;
  transition: background-color 0.3s ease;
}

.rowcell {
  display: flex;
}

.heighlight {
  background-color: orange !important;
}
🧠 Important JavaScript Concept: .flat()
The flat() method in JavaScript flattens nested arrays into a single array.
We used it to flatten the 2D array (allRows) to access each cell easily.
Example:
[[1, 2], [3, 4]].flat();
// Output: [1, 2, 3, 4]
Try It Live:-
👉 Open n*m Grid, On click highlight row and column Interview Question
Suggested Resources:
- Top CSS Interview Questions
- How to prepare for Remote Tech Interview?
- PHP Documentation – Classes and Objects
- Create a stopwatch using React
[nls_theme2]

![Top CSS Interview Questions and Answers [Latest & Most Asked]](https://mlegnhsg05mg.i.optimole.com/cb:ir3L.9a8/w:1024/h:684/q:mauto/f:best/https://techinterviewhub.in/wp-content/uploads/2025/02/pexels-kampus-8439764-scaled.jpg)