Still don’t know about Headless WordPress? Learn how it works, its advantages, who uses it, API options, authentication & full code explanation.
If you still don’t know about Headless WordPress, then you’re missing one of the most trending architectures in the web industry. In Headless WordPress, WordPress works purely as a backend service, and the entire frontend is built separately. Instead of traditional templating using PHP themes, the frontend communicates with WordPress using the built-in REST API or GraphQL.
That means you can build a fully static frontend, use server-side rendering (SSR), or take a hybrid approach — all using a Headless setup. It allows developers to use any modern framework/library that can fetch data from an external API including React, Vue, Astro, Next.js, Nuxt.js, Angular, or even static site generators.
REST API vs GraphQL In Headless WordPress (Pros & Cons)
| Feature | WordPress REST API | GraphQL |
| Data Fetching | Multiple endpoints needed | Single endpoint |
| Request Size | Can be heavy | Lightweight (fetches only needed data) |
| Learning Curve | Very easy | Requires learning GraphQL |
| Community Support | Very large | Growing quickly |
| Caching | Requires manual handling | Excellent caching via Apollo |
Conclusion:-
- If you want simplicity, use REST API.
- If you want ultimate control and performance, choose GraphQL (via WPGraphQL plugin).
Who Uses Headless WordPress?
Headless WordPress is commonly used by:
Developers who want full control of frontend
Enterprises and high-traffic websites
Real-time dashboards & applications
E-commerce and SaaS platforms
Websites where performance & scalability are top priorities
Some popular platforms using headless solutions include: Gatsby + WP, Next.js + WP, Vue + WP, etc.
Authentication in Headless WordPress (JWT Example)
A very common way to authenticate users when using Headless WordPress is JWT Authentication (JSON Web Token). Below is a simple example to register and log in users through custom API routes
Create a WordPress plugin and write below code to create an API
Step 1 — Register REST API routes
add_action( "rest_api_init", "register_api" );

function register_api () {

    // register
    register_rest_route( "headless/v1", "/register", [
        'methods'    =>  'POST',
        'callback'  =>  'head_register',
        'permission_callback'   =>  '__return_true'
    ] );

    // login
     register_rest_route( "headless/v1", "/login", [
        'methods'    =>  'POST',
        'callback'  =>  'head_login',
        'permission_callback'   =>  '__return_true'
    ] );
}
Explanation:
We hook into rest_api_init to create two API endpoints — /register and /login.
Both accept POST requests and allow public access using __return_true
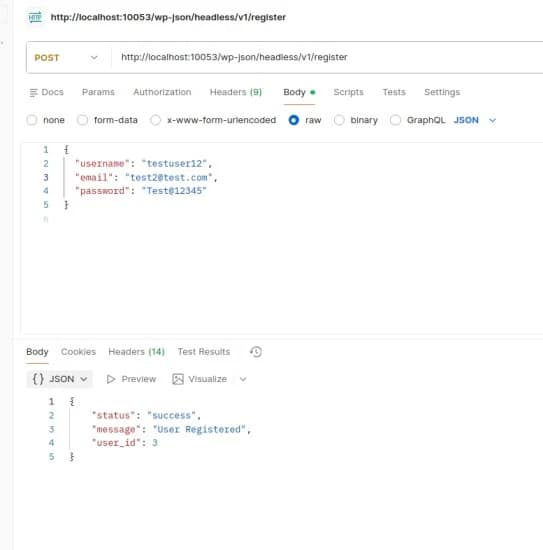
Step 2 — User Registration Endpoint
function head_register( WP_REST_Request $req ) {
    $username = sanitize_text_field( $req->get_param( 'username' ) );
    $email = sanitize_text_field( $req->get_param( 'email' ) );
    $password = sanitize_text_field( $req->get_param( 'password' ) );

    if ( username_exists( $username ) ) {
        return new WP_Error( 'exists', "username already exists", [
            'status'    =>  400
         ] );
    }

    if ( email_exists( $email ) ) {
        return new WP_Error( 'exists', "Email address already exists", [
            'status'    =>  400
         ] );
    }

    $user_id = wp_create_user( $username, $password, $email );

    return [
        'status'    =>  'success',
        'message'   => 'User Registered',
        'user_id'   =>  $user_id
    ];
}
Explanation:
Sanitizes incoming values
Checks if a username or email already exists
Creates a new user using wp_create_user()
Returns success response with user_id
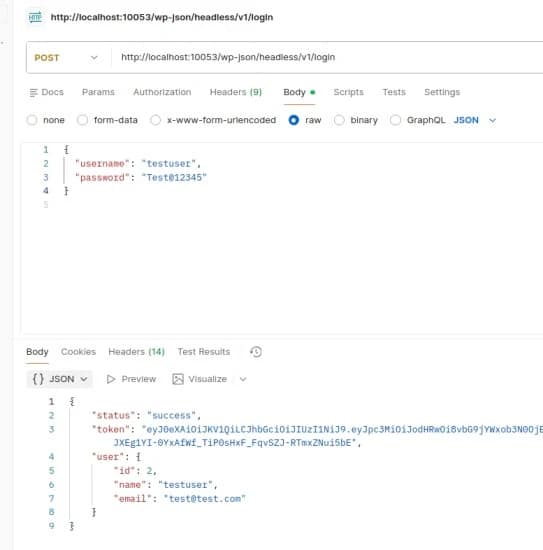
Step 3 — Login & Token Generation
function head_login ( WP_REST_Request $req ) {
    $username = sanitize_text_field ( $req->get_param('username') );
    $password = $req->get_param( 'password' );

    $user = wp_authenticate( $username, $password );

    if ( is_wp_error( $user ) ) {
        return new WP_Error( "Invalid", "Invalid Username", [
            'status'    =>  401
        ] );
    }

    $secret = JWT_SECRET;

    $payload = [
        'iss' => get_site_url(),
        'iat'   =>  time(),
        'exp'   =>  time() + ( 86400 ),
        'user_id'   =>  $user->ID
    ];

    $token = JWT::encode( $payload, $secret, 'HS256' );

    return [
        'status' => 'success',
        'token' => $token,
        'user' => [
            'id' => $user->ID,
            'name' => $user->display_name,
            'email' => $user->user_email
        ]
    ];
}
Explanation:
Validates credentials using wp_authenticate()
If valid, generates a JWT token valid for 24 hours Returns token + basic user information
This token will be sent from frontend in "Authorization: Bearer TOKEN" for protected routes.
Final Words
Headless WordPress gives you speed, flexibility, security, and limitless frontend options. If you don’t know about Headless WordPress yet, now you do — and once you start using it, you’ll never look back to the traditional WordPress theme system.
Want to learn more advanced WordPress, Headless WordPress & modern JavaScript tutorials?
Click here and follow more blogs/tutorials like this.
Want more?
Do comment if you want more tutorials like:
– JWT protected routes
– Headless WooCommerce
– Next.js + WordPress hydration & deployment